Wednesday, September 28, 2011

Day Forty-Two

     Today was a pretty successful day. I got down, and got to work. I cut through the non-drive side supports, which were significantly harder than the drive side, due to right-hand dominance and awkward angles. Eventually I got most of the way through the last support, and just turned it around until it came off. It was a feeling of pure victory. I then tightened up the hose clamps holding the fork to the cart, added two more at the bottom, and tightened those to near-dangerous levels, and I'm somewhat worried about it pulling the fork apart slowly over time, I think it should be alright though, if it's not, I'll just get an axle, or even a quick-release skewer, and put it through the front dropouts to prevent expansion, but I don't think that'll be necessary.
     Finally, after all that, I sprayed a few coats of Clear Coat (that sounded redundant) onto the seat to protect it a bit more. Ideally I'll be able to build up a plastic (Apparently Plasticine is a modelling clay...)  layer on top of the duct tape to protect it from wear and weather. I'm not sure if it'll be soft or rigid, we'll just have to see, I I honestly wouldn't mind a whole bunch. I also taped up the non-painted surfaces of the forks, and gave one side a coat of primer, albeit a thick coat. They were slightly different shades of black, and the primer I have matches the shopping cart well, and the more colors that match on this bike, the better.


For Science!


I got halfway through this cut, but then I realized that it was a bad place for a cut and wouldn't look aesthetically pleasing, and almost as bad, it might be dangerous.


Where the new cut was, much cleaner looking.


I thought that having a perfectly straight tube would be good for sticking flags or antennas or polo mallets in.


But then I took a break, and saw the ends of the forks... Realistically, they'll be covered up by some coin and epoxy-based mechanism to keep rain out.


Also, while I was taking a break from sawing, I took the plastic seat lid off, it was cramping my style. That said, I might put it back on, it completes the appearance of the cart.


The plastic seat lid.


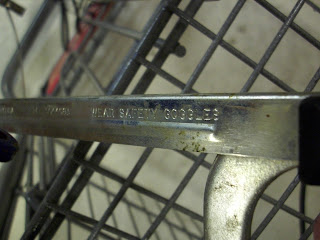
Also, I saw this label, and very promptly removed it.


This is what Victory looks like. This is the kind of scene that Nike dreams about.


I'm so happy to be done with this stage, also oil is covering my floor...


The new hose clamps at the bottom of the fork.


This may pose some danger, it's kind of sharp. But it's also difficult to come in contact with, and the entire cart is uncomfortable... I'm thinking that adding pool noodle foam in strategic locations would be beneficial.


It's perfectly symmetrical. For aesthetic reasons mainly, though keeping equal pressure is important too.


The other side.


The forks after they've been taped and had a one coat of primer. (Still Wet)
Day Thirty-Five

      I cut through the other post on the drive side, and it was made incredibly easier by using some 3-in-1 oil. At the time I thought that three in one did an absurd amount of work, reducing the cutting time by 30-odd minutes, but I also found out just this night that the post was actually skinnier than the first one I cut through, and had thinner walls. Oh well. Two more to go.


 Copious amounts of Oil.


Drive side done!


     I apologize for not posting in two weeks, I meant to post this the day that it occurred, but I've been having technical issues/am just getting my act together now.

Wednesday, September 21, 2011

Pictures from The Great Cartbike Adventure

     I found where Treat put up some pictures from our cartbike adventure, and they are pretty damn rad. That said, it's terrifying to think that I had him in the cart while he had his DSLR. There's a reason that half of the pictures show the cartbike crashed or on it's side.

     They're also pretty good quality (and artistic) so it's worth your time to check them out.

     http://treat-s.blogspot.com/2011/09/summer-2011-part-2-great-cartbike.html

Wednesday, September 14, 2011

Day Twenty-Eight

       I got to work sawing off the supports of the wheels on the cart. It took a very long time. The better part of an hour to cut trough one of the four points. This is going to b a long week.


Before sawing.


Admittedly, 70% of that was accomplished during "rage mode" in the last five minutes.

Sunday, September 11, 2011

Edit

     It occurred to me that the Day numbers were profoundly inaccurate, so I'll be fixing that right now.

Tuesday, September 6, 2011

Day Twenty

     Today I went back to the bike shop for the first time in far too long of a time, and I picked up two 26" forks! They look like they're different widths, but the axle space is equally wide, and they will hold the same size wheel. Also, they're both suspension forks, so this is going to be a front-suspension cartbike (If only I had a soft-tail mountain bike for a frame!). Now, I'll have to start sawing the wheels off the cart, I used a muffler cutter today, and despite the amount of sparks, it is nice! Then I'll mount the forks, and eventually get some wheels. But not tonight, because I'm tired.


Tuesday, August 30, 2011

Day Thirteen

     After another day of riding, the weakest points on the cartbike failed. A crash knocked off the front handlebars, they were luckily going unused, but it just shows that zip ties aren't that strong. Also, the plastic that held the crank set away from the bottom bracket collapsed, leaving that back at square one. After two rides to and from the hardware store, Clydefrog and I got the right brass washers (cheaper than stainless steel, and thicker), and finally resolved this problem, though another spritz of lube was necessary. 


Back to square one.


Very Bad


Only one of these was the right size (it was the big one.) Measuring is important!


Fixed!