Right now, I'm faced with the choice of what to do with the brakes. I could leave the rear brake on and just take off the front brake, or, I could take both off, and put it on the two front forks. I'm fairly conflicted right now, and for my own benefit, I'm listing out the pros and cons for both.
For putting it on the front wheels, there's the slight advantage of forward momentum, plus, it might be more road legal, having two brakes instead of one. It could also cornering easier, being able to lock one wheel and pivot. Last, I think that it would be pretty cool to have a left brake lever go to the left wheel, and a right brake lever go to the right wheel.
But, the rear brake should work fine, considering that this is not a speed machine. And, cartbikes have a tendency to tip over if they corner to hard, so cornering any harder than I can to begin with is probably not any better. It'll be a little bit less work. And it would reduce the risk of flipping forward. Though the wheelbase should be long enough to make that impossible, it would probably be better to keep as much torque off of the front connections as possible, seeing as they are the weakest spot in this whole project. And for that reason mainly, I'm going to go with a single rear brake, at least for now.
Wednesday, August 24, 2011

Day Eight
 Today started out uneventful, I just finished cleaning the chain and loosening up the stuck links, and lubed up the chain. However, just an hour ago, my friend showed me a cart he found in a park. It's a bit smaller than a full-sized cart, but I think that it makes it a bit more practical. Overall, it's 38 inches tall, and 32 inches long. The basket itself is 26 inches long, 12 inches deep, and 17 inches wide at the handle. It'll do just fine.
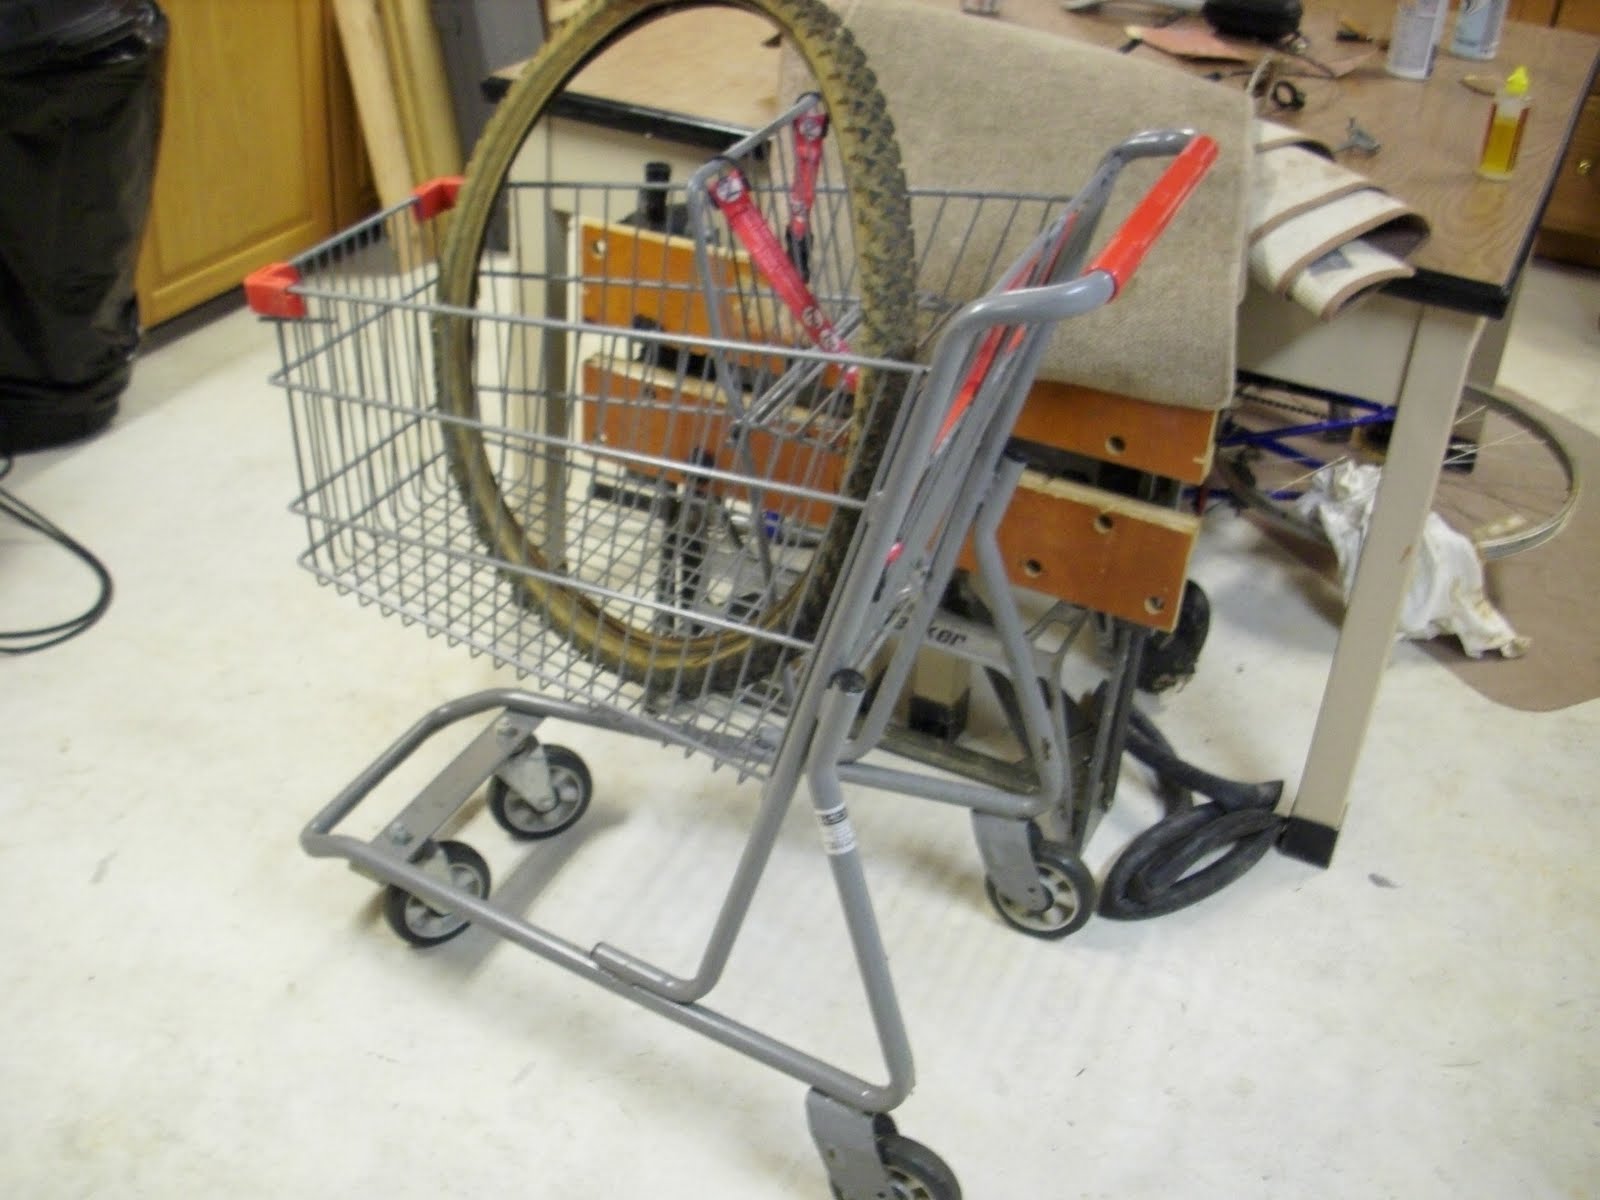 Right now, I think that I'll keep the baby seat, because it's convenient in case I need to pick up infants, but more so that I can put food and stuff there and have it in easy access. However, it's time to knock off some plastic, attach the stem to the cart's handlebars, mount the brake levers and shifter, and then saw off the bottom of the basket, for improved clearance, and so that I can get more done before I get the forks, and avoid waiting.
[Right, the cart with a 26" Tire for size comparison.]
Tuesday, August 23, 2011
Day Four
Today's the day that it's finally starting to come together. My friend Clydefrog came over, and he had the crankpullers that I didn't, as well as a bit (lot) more bicycle knowledge than I do. He came, and instantly diagnosed the bottom bracket as a cartridge, which was music to my ears. We took the drive-side crank off, and the entire crank set with it. However, we almost stripped the crank and nearly ruined the crank puller. But, we persevered, and eventually got it off in one piece.
Before doing anything with that, I sanded down the chainstay that was wrecked by the gears, and sprayed on a clear coat to keep the rust out, and it looks a lot better.
Then, to avoid the chainrings digging into the frame again, we needed to rig up something to keep it away from the frame. Clyde, coming from the school of thought of having things look good and work well, wanted to put some washers on the crank nut, however, that didn't solve the problem, the crank still wanted to move inward on the bottom bracket. Me, coming of the school of thought of having things work, well or not, I punched a hole in a bottle cap, sawed it off, and then slid it on the axle to keep the crank out. After a couple drops of lube, it works. I understand that this is only solving a symptom of the greater problem, but one of my goals is to do this on as little money as possible, if any at all.
The derailleur limits had to be changed, since the crank set was further out. I decided that realistically, we'd only be using the lowest gear, so I just took it off. Tomorrow I'll need to finish cleaning the chain. Overall, today was a very productive day.

The Chainstay after the crank set was taken off, really rusty and awful-looking.

After sanding it off and spraying on a clear coat, it doesn't necessarily look good, but it looks better, and is better.

Intense enough? Clydefrog's feet make a Cameo.

Nut and washers, wasn't used

The bottle cap on the axle. I used a 1/2" Spade Drill Bit, (the cutting one) and just rotated it by hand util I got a 1/2" hole. The plastic I used was soft enough that I didn't have to use a drill.

After sawing it off. If I can find washers large enough, I'll replace it, because while there would be a bit more friction, but it'll be more sturdy.

It's no longer dug into the chainstay, but this picture's also evidence of how much more I need to do on the chain.

Another angle of above.

Derailleur!
Saturday, August 20, 2011
Day Five
I cleaned the chain today, and got it back into working order, but this bike is having fewer and fewer redeeming qualities. The rear derailleur works fine, though I might have to adjust the limits, that's an easy task. I believe the front derailleur is in the same condition. However, the bottom bracket will take more work than previously anticipated, I'm hoping it'll just involve tightening the cranks to realign it, but it's shaping up not to be that simple. Additionally, the middle chainring is wrecked, and right now I'm trying to decide whether it would be worth ordering a new one. I might not, considering that there are parts that I'll won't be able to do without on this bike, and a chainring is not one of them. I will most likely just take the second ring off, adjust the chainline and derailleur, and cross my fingers. This all depends on the condition of the small chainring, if it's wrecked, it'll change my game plan.

Super rusty.

One segment cleaned, about eight to go.

Not factory clean, but it's a vast improvement. A wire brush and a bottle of Rock and Roll work wonders.

Horrible crack. It's beginning to scare me how someone let their bike get in this shape, there appears to be something, that alone would be serious enough to have to get the bike repaired, wrong with every part group.

I have no idea how this bulge even happened.

Super rusty.

One segment cleaned, about eight to go.

Not factory clean, but it's a vast improvement. A wire brush and a bottle of Rock and Roll work wonders.

Horrible crack. It's beginning to scare me how someone let their bike get in this shape, there appears to be something, that alone would be serious enough to have to get the bike repaired, wrong with every part group.

I have no idea how this bulge even happened.
Day Four
I took the rear wheel off, took off the tire and inner tube, and cleaned off the cassette. It spins well, coasts easily and is fairly in true.
 The innertube remarkably still holds air, which is great, although the rim tape is completely disintegrated, so that'll need to be replaced.
 The wheel before taking the rust off the cassette and cleaning it up a bit.
 After cleaning, the cassette looks really good, and is in pretty good condition.
Tuesday, August 16, 2011
Steering Idea
I saw this Article on Under the Choko Tree, and I am considering taking his approach to attaching the forks to the cart, although I'm not sure it would hold weight quite as well. We'll see
Day One
I was on my way home after picking up some lube, and thanks to construction in the street, I had to turn a block early, and I chanced upon the perfect candidate for the cartbike's frame and drive train. An old GT Outpost, light, multi-geared, 26-er.

(Right) The bike after hosing it off, leaning to dry, and drain. (See the bottom picture)

I foresee some plaid duct tape and a bottle of rubbing alcohol in this seat's future.


Rusty, rusty, rusty chain.
To emphasize my point, chains do not zigzag in that fashion under anything resembling normal circumstances.

The main problem here is that the bottom bracket has come loose, there's a gap between the left crank and it, where it should be flush. This caused the chainrings to dig into the chain stay and become immobile, cause large amounts of sadness, and non-biking scenarios.

There's a better shot. If anything, that will make or break this bike, and decide whether I'm using it for parts or not.

Those are some gorgeous break pads, and the breaks themselves are just as pretty.

The cassette looks alright, it's just the chain that's got it rusted static. It's coasters work fine though.

This bike has THREE triangles. Not two, but three. Apparently that tiny triangle makes it one million times better.

I loaded it into the trunk, and it bled all over. Strange liquids came out of the frame and covered the back of the car. It may well be cursed...

Foreboding.

(Right) The bike after hosing it off, leaning to dry, and drain. (See the bottom picture)

I foresee some plaid duct tape and a bottle of rubbing alcohol in this seat's future.


Rusty, rusty, rusty chain.
To emphasize my point, chains do not zigzag in that fashion under anything resembling normal circumstances.

The main problem here is that the bottom bracket has come loose, there's a gap between the left crank and it, where it should be flush. This caused the chainrings to dig into the chain stay and become immobile, cause large amounts of sadness, and non-biking scenarios.

There's a better shot. If anything, that will make or break this bike, and decide whether I'm using it for parts or not.

Those are some gorgeous break pads, and the breaks themselves are just as pretty.

The cassette looks alright, it's just the chain that's got it rusted static. It's coasters work fine though.

This bike has THREE triangles. Not two, but three. Apparently that tiny triangle makes it one million times better.

I loaded it into the trunk, and it bled all over. Strange liquids came out of the frame and covered the back of the car. It may well be cursed...

Foreboding.
Subscribe to:
Posts (Atom)